Requirements to Register an AWS Account for the Free Tier
Table of Contents
To take advantage of the AWS Free Tier, which provides free access to certain services for one year, you need to meet the following requirements:
- Valid Email Address: You must have a valid email address to register for an AWS account.
- Credit or Debit Card: AWS requires a payment method for account verification, even though you’ll be using the free tier. Charges will only occur if you exceed the free tier limits.
- Phone Number: A phone verification process is part of the registration.
- Free Tier Eligibility: The free tier includes services such as EC2, S3, and RDS with usage limits. For EC2, you can use up to 750 hours per month of t2.micro or t3.micro instances.
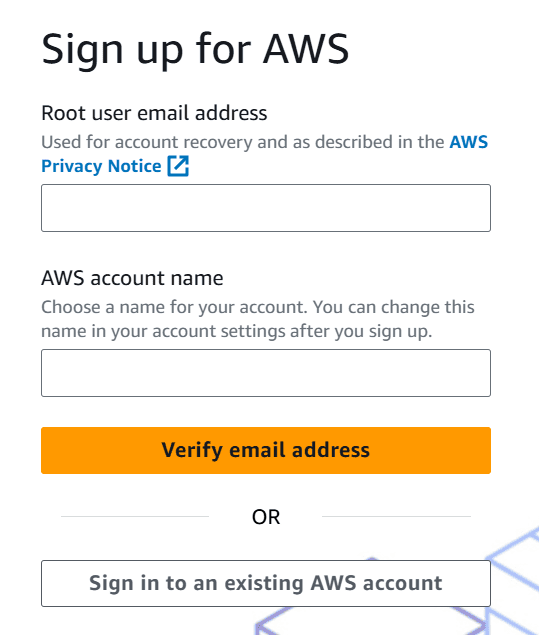
For more details on free tier eligibility, refer to AWS Free Tier Documentation.
Step-by-Step Guide to Create Your First EC2 Instance on AWS
Step 1: Log in to Your AWS Account
- Go to AWS Management Console.
- Sign in using your credentials.
Step 2: Select a Region
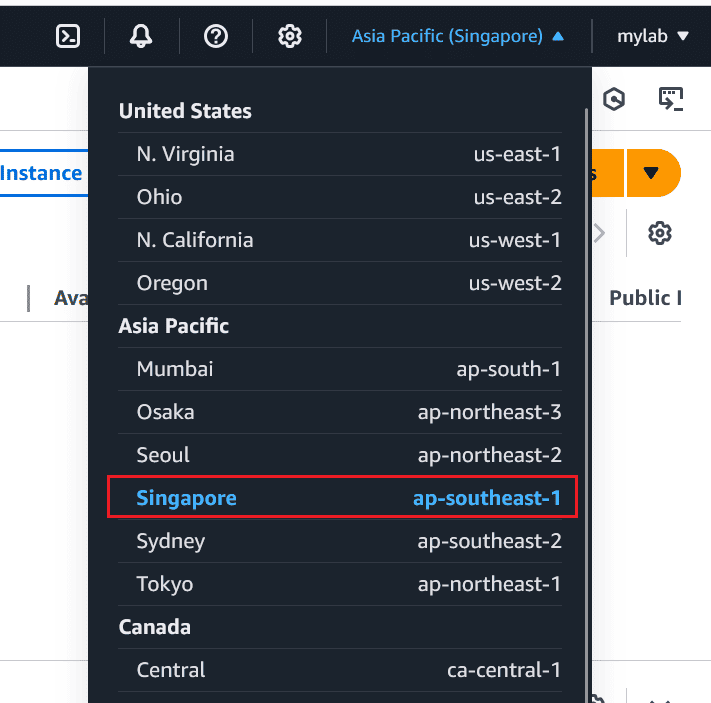
AWS offers multiple regions worldwide. Since you’ve chosen Asia Pacific, select Singapore (ap-southeast-1) as your region.
To set the region:
- Click the region dropdown at the top-right corner of the AWS Management Console.
- Choose Singapore from the list.
Step 3: Launch an EC2 Instance
Follow these steps to launch your first EC2 instance:
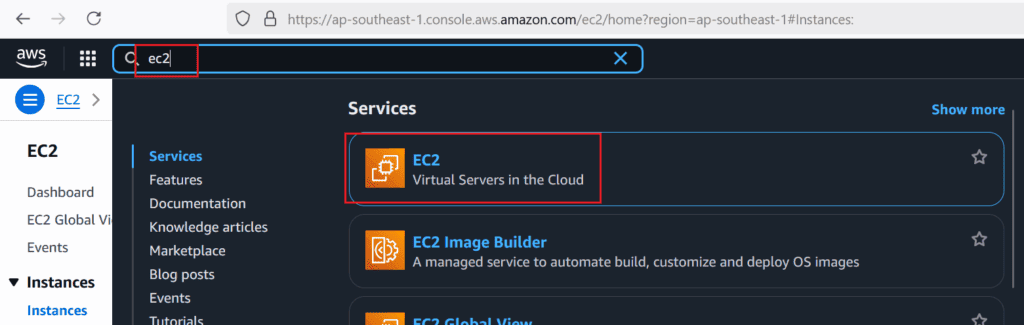
1. Navigate to EC2 Dashboard
- From the AWS Management Console, search for EC2 in the services menu and click on it.
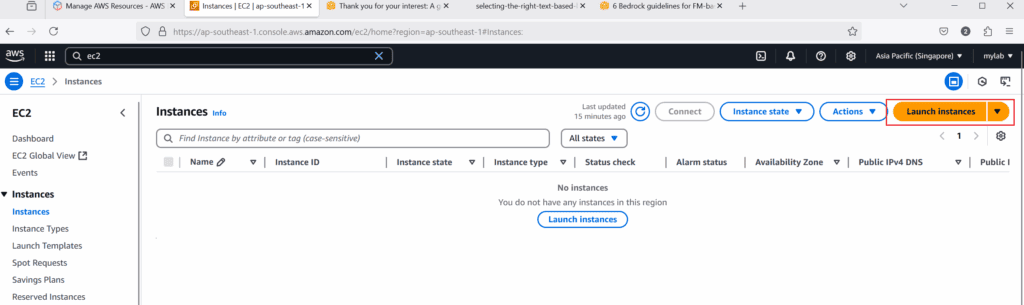
2. Click “Launch Instance”
- On the EC2 dashboard, click the Launch Instance button.
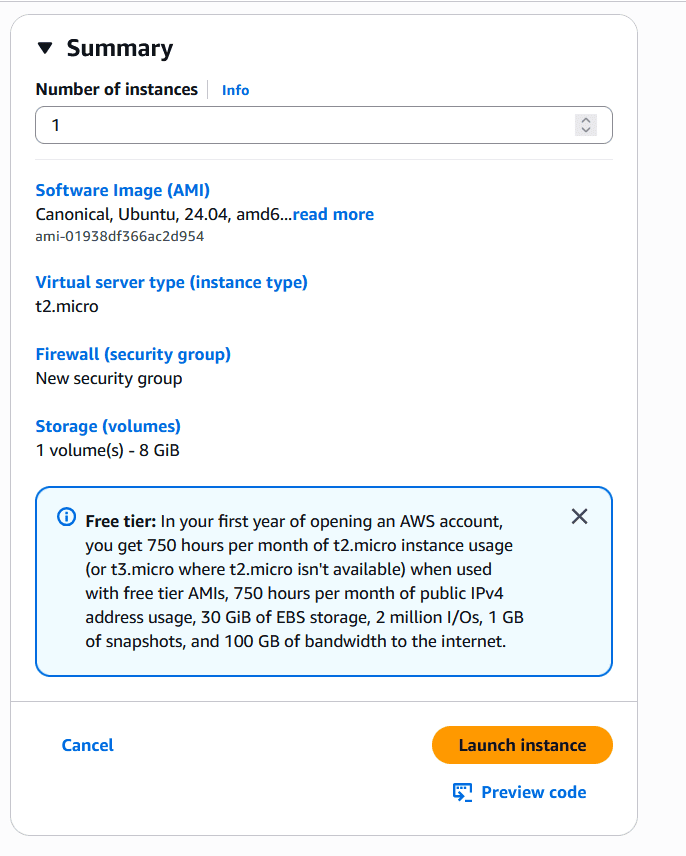
3. Configure Instance Details
- Name and Tags: Enter a name for your instance (e.g., “Ubuntu-Server”).
- AMI (Amazon Machine Image): Select Ubuntu Server 24.04 LTS from the list of available AMIs.
- Instance Type: Choose t2.micro or t3.micro (eligible for the free tier).
- Key Pair: Create a new key pair or use an existing one to securely access your instance.
- Network Settings: Ensure you allow SSH access (port 22) in the security group.
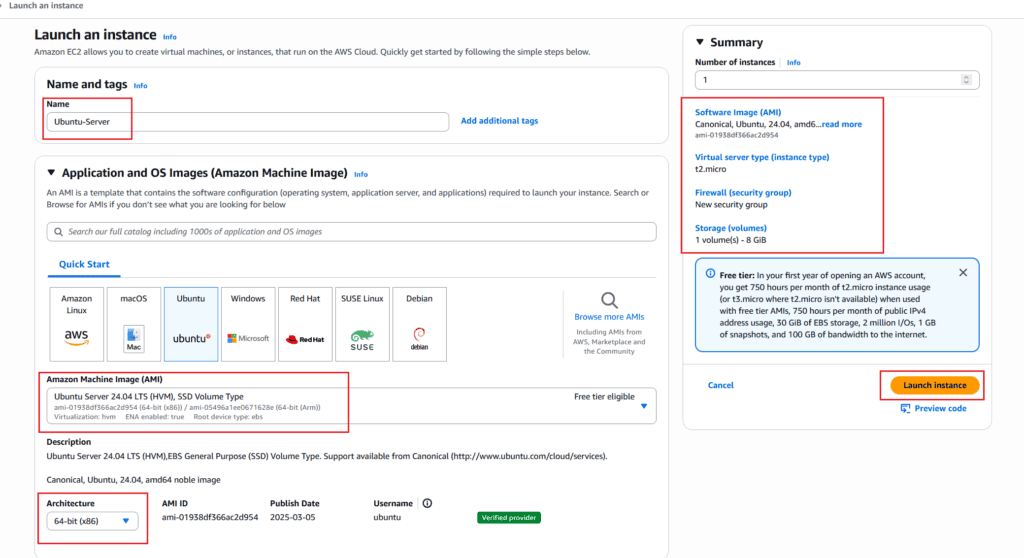
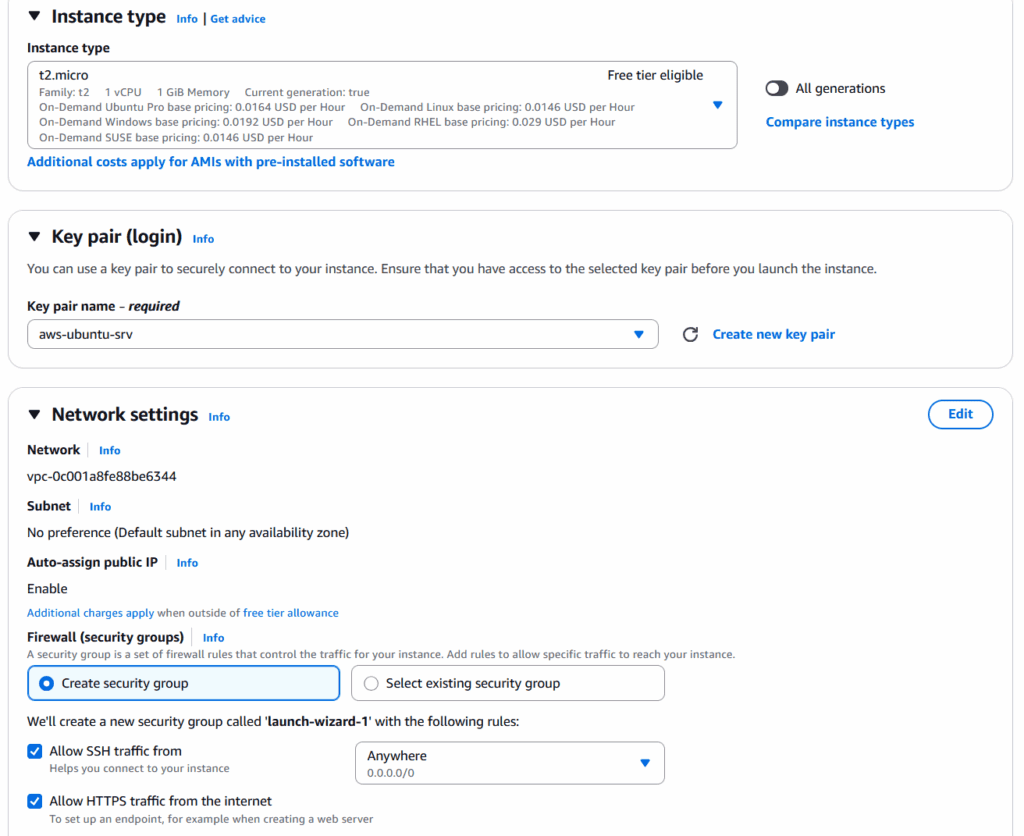
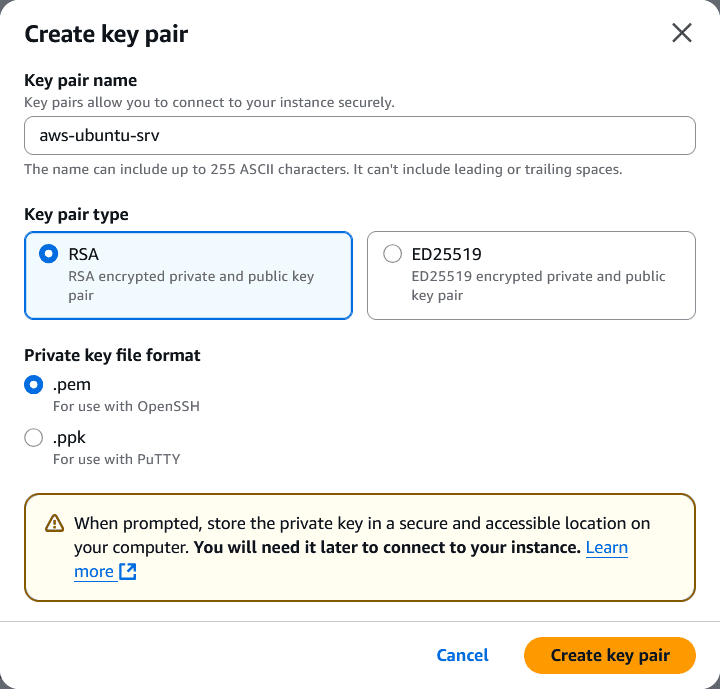
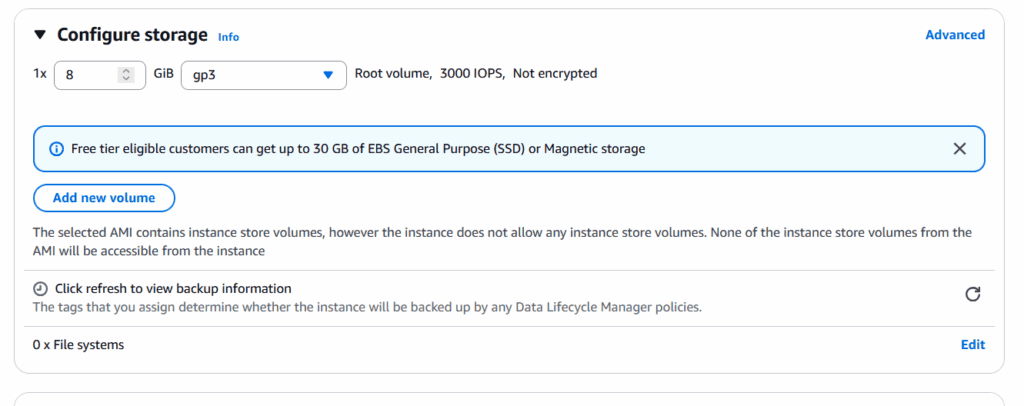
4. Review and Launch
- Review the configuration, and click Launch Instance.

Step 4: Connect to Your EC2 Instance
After launching the instance, connect to it using SSH:
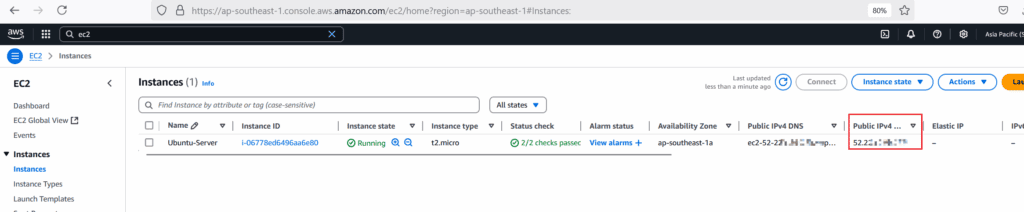
1. Locate Your Public IP Address
- Go to the EC2 dashboard and select your instance.
- Copy the Public IPv4 Address from the instance details.
2. Open Terminal (Linux/Mac) or SSH Client (Windows)
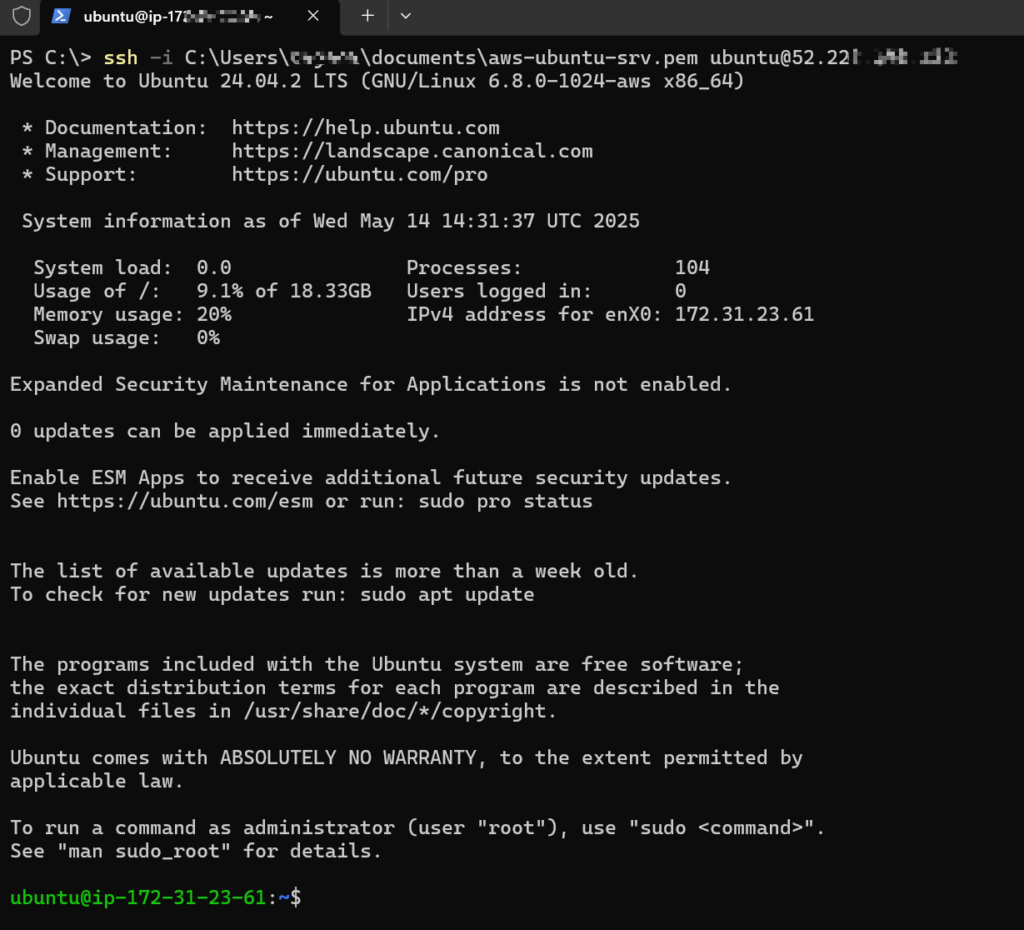
Run the following command to connect to your instance:
ssh -i /path/to/your-key.pem ubuntu@<YOUR_PUBLIC_IP>
Replace /path/to/your-key.pem with the path to your downloaded key pair file, and <YOUR_PUBLIC_IP> with the public IP of your instance.
The permissions for the private key file need to be restrictive enough to ensure security, as SSH requires the private key file to be readable only by the owner. Here’s what you need to set on Windows, Linux, and Mac:
Windows
On Windows, SSH expects the private key file to be accessible only by your user account. A simple way is put the key under c:\users\yourusername whether its Documents folder or Download folder. It should be good.
Linux / Mac
On Linux or macOS, SSH expects the private key file to have 600 permissions, meaning:
- Owner: Read and write access.
- Group and Others: No access.
Steps to Set Permissions
- Set restrictive permissions:
chmod 600 /path/to/key.pem - Verify the permissions:
ls -l /path/to/key.pemThe output should look like:-rw------- 1 username groupname 1675 Oct 14 10:00 /path/to/key.pem
Summary of Permissions
- Owner:
rw(read and write). - Group:
---(no permissions). - Others:
---(no permissions).
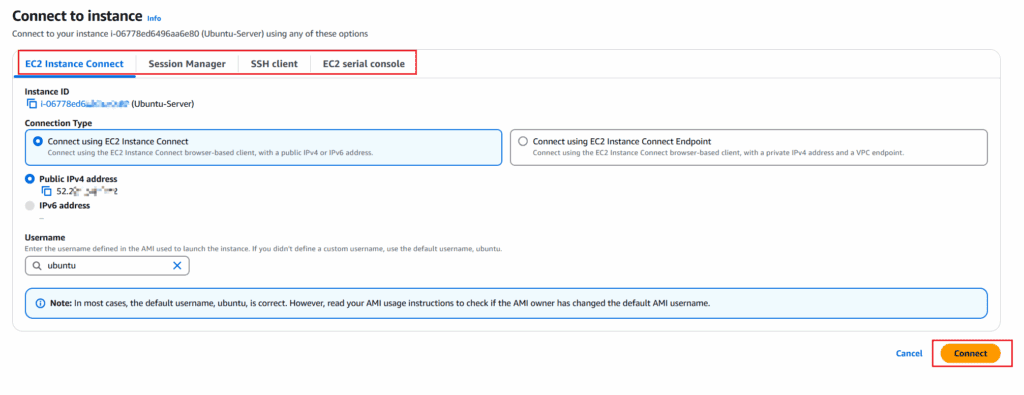
Alternatively, you can also connect via the AWS console by client connect button in the top right of the EC2 instance page.

Here is several methods that you can choose to connect to the vm.
3. Verify Connection
You should now be logged into your Ubuntu 24.04 instance.
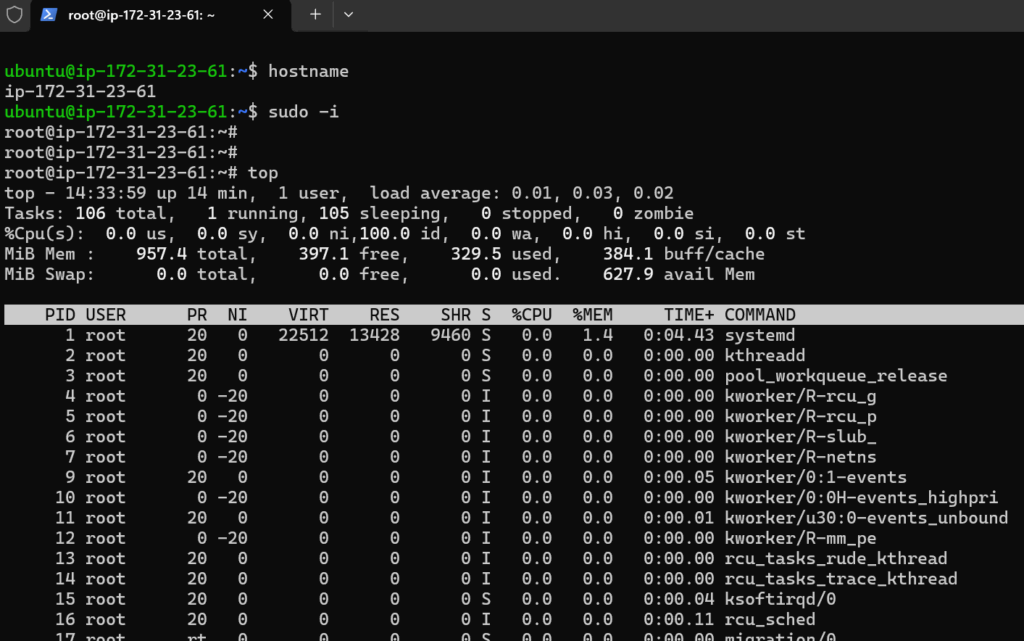
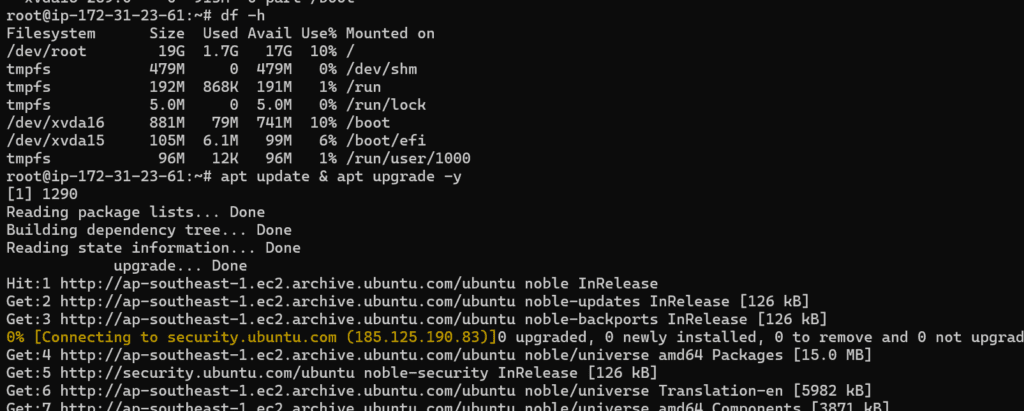
Now explore your journey in AWS.
1 thought on “How to Create Your First EC2 Instance on AWS (Ubuntu 24.04)”