Introduction
In our previous article, Optimize Inpainting Resolution in ComfyUI, we explored techniques to enhance resolution during inpainting workflows using specialized models. Building on that foundation, this article focuses on inpainting with generic diffusion models, offering a versatile approach for scenarios where specialized inpainting models are unavailable or unsuitable.
This guide walks you through the process step-by-step, highlighting key nodes such as Set Latent Noise Mask and Remove Latent Mask to achieve seamless results. By the end, you’ll understand how to refine textures, balance denoising parameters, and adapt workflows for consistent outputs—all while leveraging the flexibility of generic models.
Let’s dive into the workflow and explore how to use generic diffusion models for inpainting in ComfyUI.
Table of Contents
Why Use Generic Diffusion Models for Inpainting?
- Limitations of Specialized Models: Models like Flux.1 Schnell may fail in certain scenarios, especially when working with distilled models.
- Advantages of Generic Diffusion Models: Generic models, such as Juggernaut XL, provide broader compatibility and improved image quality in non-commercial applications.
- Ideal Use Case: This approach is perfect for preserving original textures while generating new content in masked areas.
Step-by-Step Workflow for Inpainting with Generic Diffusion Models
Step 1: Preparing the Image and Mask
- Load the Background Image:
- Use the Load Image node in ComfyUI to import your image.
- Create the Mask:
- Right-click the image and choose Open in Mask Editor.
- Paint over the area you want to inpaint (e.g., removing a table).
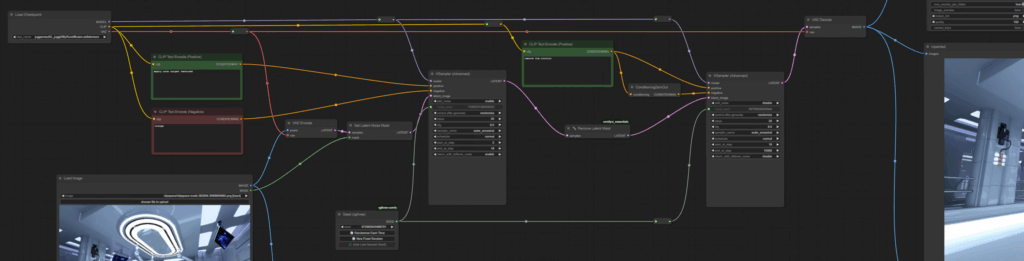
Step 2: Setting Up the Graph
- Add KSampler Advanced Nodes:
- Use two KSampler nodes for refinement:
- The first node performs the majority of diffusion steps (e.g., 18 out of 20).
- The second node resamples the image for consistency (e.g., 2 steps).
- Configure prompts:
- First node: Specify details for the inpainted area (e.g., “empty room, carpet textured”).
- Second node: Include the full prompt to match the original image.
- Use two KSampler nodes for refinement:
- Adjust Denoise Parameters:
- For standard KSampler nodes, set denoise values between 0.6 and 0.8 for optimal results.
- For advanced nodes, manually control noise addition during diffusion steps.
Step 3: Using Set Latent Noise Mask
- Purpose: Separates areas for image-to-image operations and random noise generation.
- Configuration:
- Connect the latent image from VAE Encode to the Set Latent Noise Mask node.
- Connect the mask from the Load Image node to the same node.
- Send the latent output to the first KSampler node.
Step 4: Refining the Workflow with Remove Latent Mask
- Purpose: Ensures the resampling process applies to the entire image, not just masked areas.
- Configuration:
- Install the ComfyUI Essentials Node Pack via the Manager.
- Add the Remove Latent Mask node between the two KSampler nodes.
Step 5: Comparing Results
- Add the Image Comparer node (available in the rgthree node pack).
- Connect the original image and the decoded output from VAE Decode to the comparer inputs.
- Expand the comparer node to analyze before-and-after differences.
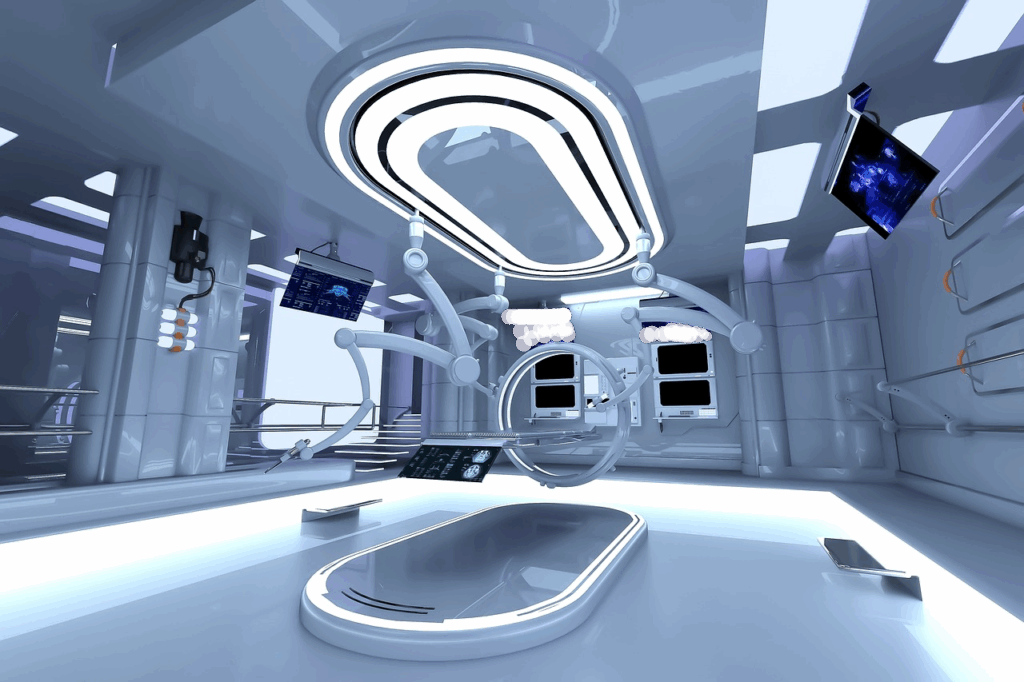
Optimized one:

Key Insights for Optimizing Results
- Model Selection: Juggernaut XL offers softer textures and better anti-aliasing compared to other models.
- Denoising Values: Experiment with values between 0.6 and 0.8 for balanced context preservation.
- Prompt Configuration: Use targeted prompts for inpainted areas and comprehensive prompts for resampling consistency.
Conclusion
Inpainting with generic diffusion models in ComfyUI provides a flexible and powerful alternative to specialized workflows. By leveraging nodes like Set Latent Noise Mask and Remove Latent Mask, you can achieve seamless results that preserve original textures while generating new content. Whether you’re working on commercial or non-commercial projects, this approach allows for greater control over image quality and refinement.
For more advanced techniques and troubleshooting tips, explore our previous article on Optimizing Inpainting Resolution in ComfyUI.