Introduction
Outpainting, also known as canvas extension, is a specialized form of inpainting used to expand an image’s dimensions while preserving its visual integrity. This technique is particularly useful for adjusting aspect ratios or creating cinematic visuals. In this guide, we’ll explore how to implement outpainting using ComfyUI, focusing on workflow setup and node configurations.
Table of Contents
What is Outpainting?
Outpainting involves generating new content outside the boundaries of an existing image while maintaining consistency with the original data. Unlike traditional inpainting, which fills gaps within an image, outpainting extends the canvas, often to achieve specific proportions or aesthetic goals. For example, you can transform an image into a cinematic aspect ratio of 2.35:1 using this technique.
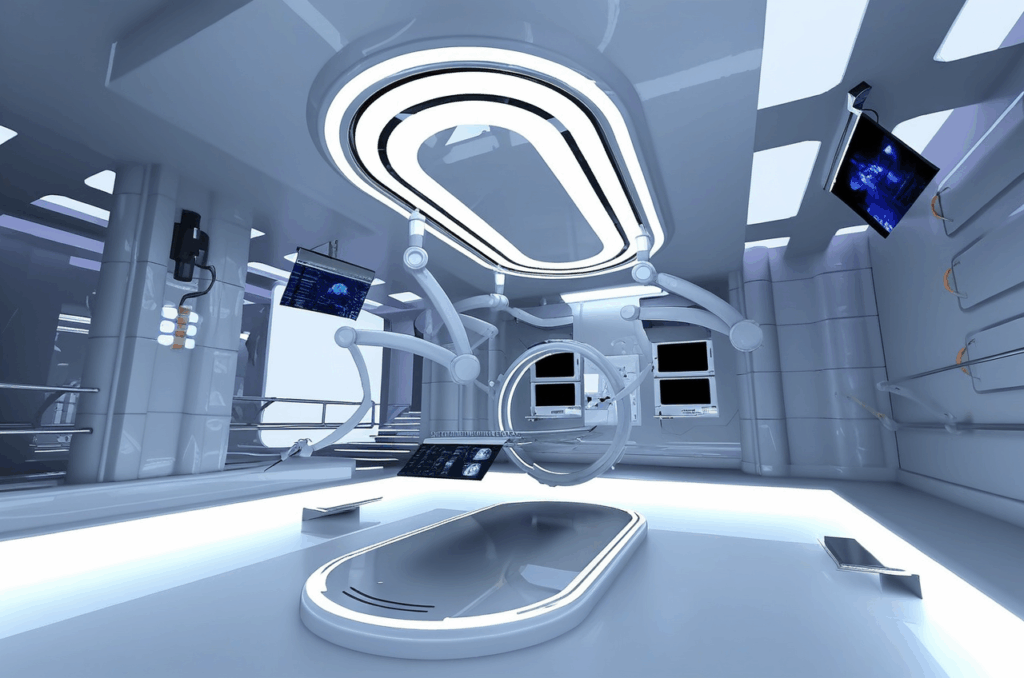
Original Image:
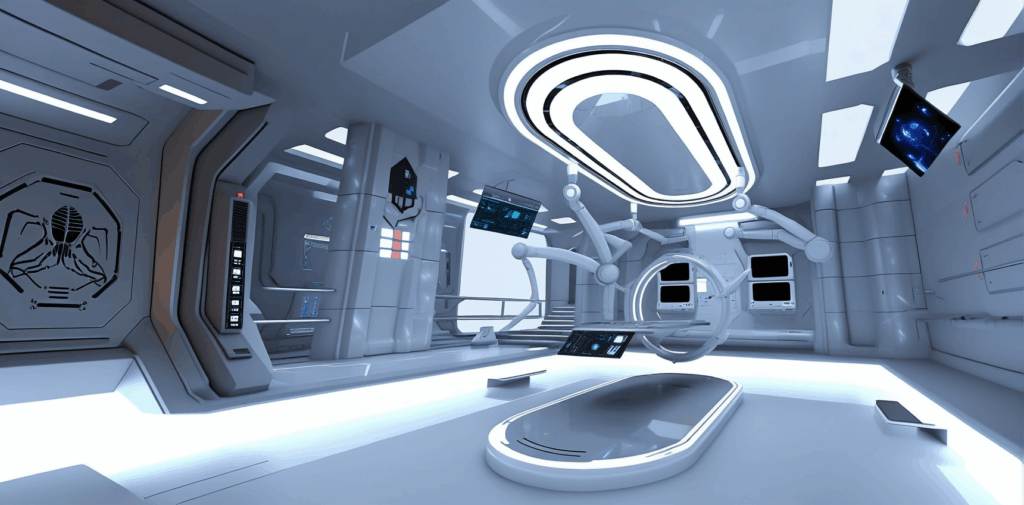
Outpainting the left area:
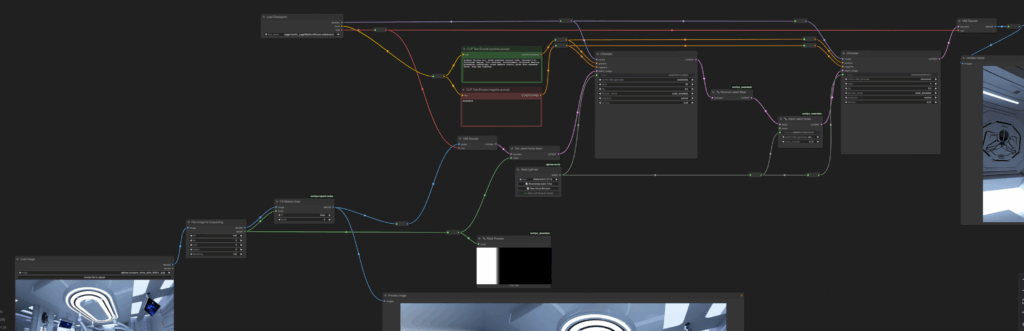
Setting Up the Outpainting Workflow in ComfyUI
Prerequisites
Before starting, ensure you have ComfyUI installed and functional. Additionally, install the ComfyUI Inpaint Nodes pack, which contains specialized nodes for outpainting. You can search for this pack in the manager, install it, and restart ComfyUI.
Step 1: Load the Image
- Use the Load Image node to import the image you want to modify.
- Configure the node to load your desired file. For instance, if your image is named
c28_outpaint, select it as the input.
Step 2: Pad the Image for Outpainting
- Search for the Pad Image for Outpainting node and connect it to the image output of the Load Image node.
- Configure the padding parameters:
- Extend the canvas by 440 pixels on the left side.
- Set the feathering value to 120 pixels for a smooth transition between the original and extended areas.
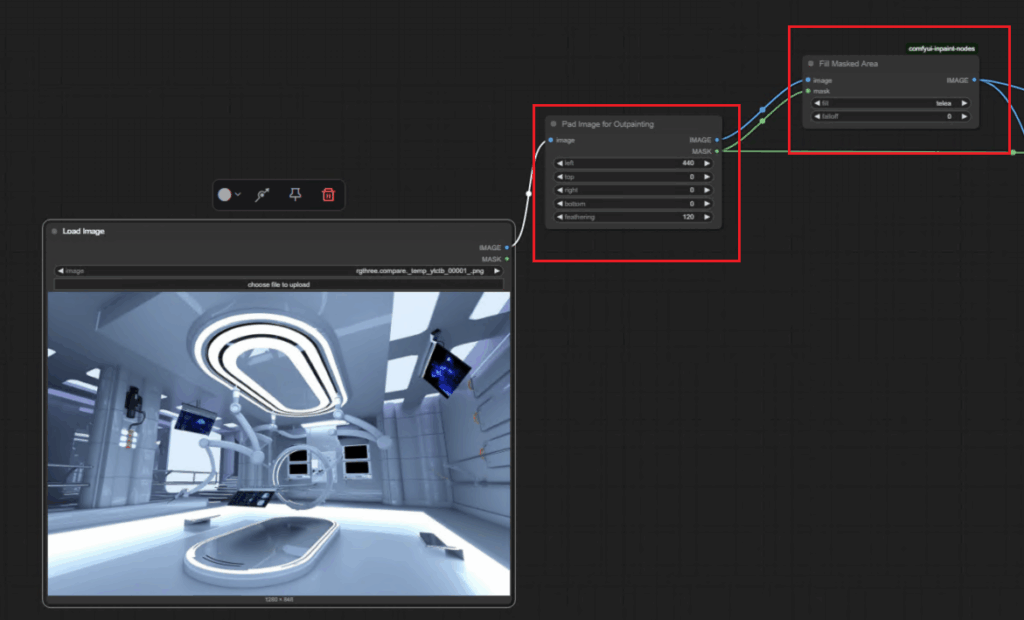
Step 3: Fill the Masked Area
- Add the Fill Masked Area node and connect it to both the image and mask outputs of the Pad Image for Outpainting node.
- Change the Fill parameter to
telea. This setting ensures the blank area is filled with data derived from the edge pixels of the original image, providing a seamless extension.
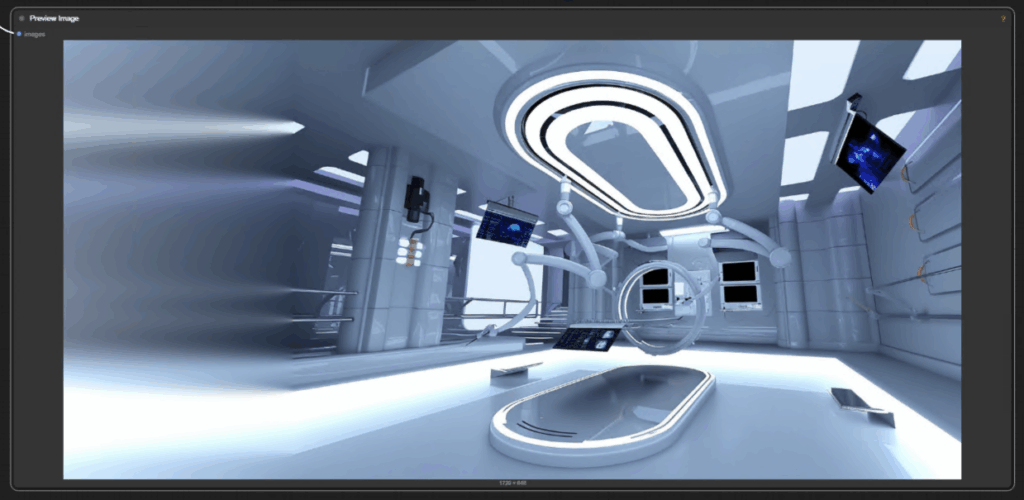
Step 4: Preview and Encode
- Connect the Fill Masked Area node’s image output to a Preview Image node to visualize the filled area.
- Link the Fill Masked Area node to the VAE Encode node to convert the image into latent space, preparing it for further processing.
Step 5: Configure Mask and Noise Settings
- Connect the Pad Image for Outpainting mask output to the Set Latent Noise Mask input. This step ensures that random noise is not applied to the masked area.
- Add a Remove Latent Noise Mask node to erase the mask created earlier, enabling sampling across the entire image.
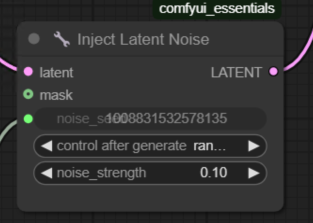
Step 6: Inject Latent Noise
- Insert the Inject Latent Noise node between the Remove Latent Noise Mask node and the second KSampler node.
- Reduce the noise strength to 0.1. This slight noise addition enhances the transition zone between the original and extended image areas.
Step 7: Configure Sampling Nodes
- Use two KSampler nodes:
- The first sampler performs 20 inference steps with a de-noise value of 0.65. This step generates the initial outpainting data.
- The second sampler refines the output with 4 inference steps and a lower de-noise value of 0.2.
- Connect a consistent seed node (e.g., rgthree Seed) to both samplers and the Inject Latent Noise node for uniform results.
Step 8: Finalize and Execute
- Double-check all node connections and parameter configurations:
- Padding: 440 pixels (left side) and feathering: 120 pixels
- Noise strength: 0.1
- Fill parameter:
telea
- Click Queue Workflow to execute the process.
Once completed, the extended canvas should blend seamlessly with the original image, thanks to the telea parameter and the refined sampling steps.
Key Benefits of Outpainting
- Aspect Ratio Adjustments: Perfect for creating cinematic visuals or fitting images into specific formats.
- Consistency: Ensures the added content matches the original image’s style and detail.
- Flexibility: Allows customization of padding, feathering, and noise parameters to suit various projects.
Example Code Snippet for Node Setup
Here’s a simplified representation of the node connections for outpainting:
Load Image --> Pad Image for Outpainting --> Fill Masked Area --> VAE Encode
              |                           |                   |
              |                           |                   --> Set Latent Noise Mask
              --> Mask Preview            --> Preview Image
References
For more details on ComfyUI and node configurations, refer to the official documentation:
ComfyUI Documentation