Introduction
In previous article, we learned Automatic masking is a critical technique in image editing workflows, especially when isolating foreground subjects from backgrounds for tasks like in-painting or compositing. In this article, we’ll explore how to use the Segment Anything Model (SAM 2) with ComfyUI to automate the masking process. By leveraging custom nodes and workflows, you can efficiently define masks, soften edges, and replace backgrounds.
Table of Contents
Key Components for Automatic Masking
1. Installing Required Node Packs and Models
To get started with automatic masking, you need to install the following:
- Node Packs:
Use the ComfyUI Manager to search for and install these node packs. Once installed, restart ComfyUI. - SAM 2 Model:
- Download the sam2.1_hiera_base_plus-fp16 model from Hugging Face.
- Place the model in the
ComfyUI/models/Sam2directory. If the model isn’t automatically installed, follow the manual installation steps provided on the Hugging Face page.
2. Setting Up the Workflow
Once the required tools are installed, you can create a workflow for automatic masking. Here’s a step-by-step guide:
Load Images
Start by loading the foreground and background images into ComfyUI using the Load Image nodes. Ensure the image resolution is known, as it is required for segmentation.
Get Image Resolution
Use the Get Image Size node from the Essentials Pack to extract the width and height of the loaded images. Connect the output of the Load Image node to the Get Image Size node.
Define Segmentation Coordinates
To specify the points for segmentation:
- Add the
Points Editornode from the KJNodes pack. - Connect the image, width, and height outputs from the
Get Image Sizenode to thePoints Editor. - Right-click on the
Points Editornode and choose:- Convert Widget to Input for both width and height.
- New Canvas to create a blank canvas.
Load SAM 2 Model
- Add the
Download SAM 2 Modelnode and ensure the model parameters are set to:- Model:
sam2_hiera_base_plus - Device:
cuda - Precision:
floating.16
- Model:
- Connect the output of the loader node to the
SAM 2 Segmentationnode.
Create Segmentation Mask
- Add the
SAM 2 Segmentationnode. - Connect the image and coordinates (positive and negative points) from the
Points Editornode to the segmentation node. - Preview the mask output using the
Mask Previewnode from the Essentials Pack.
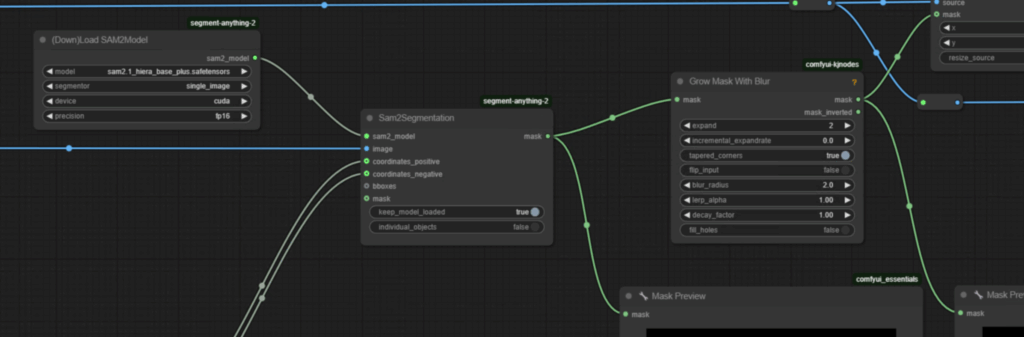
3. Improving Mask Quality
Soften Edges with Blur
To refine the mask, use the Grow Mask with Blur node from the KJNodes pack:
- Place the
Grow Mask with Blurnode between theSAM 2 Segmentationnode and theImage Composite Masknode. - Adjust the following parameters:
- Blur Radius: Set to
2for smoother edges. - Expand Value: Set to
2 pixelsto slightly grow the mask.
- Blur Radius: Set to
- Use the
Mask Previewnode to visualize the changes in real-time.
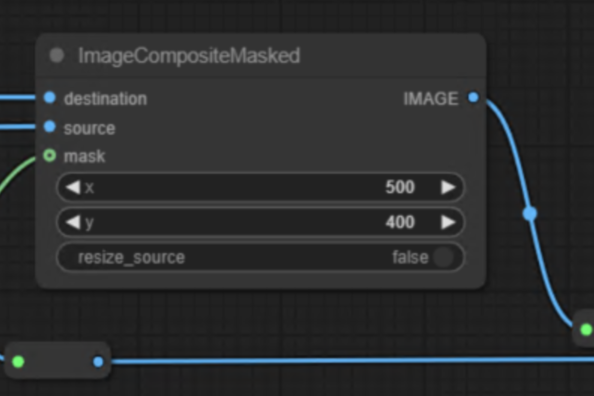
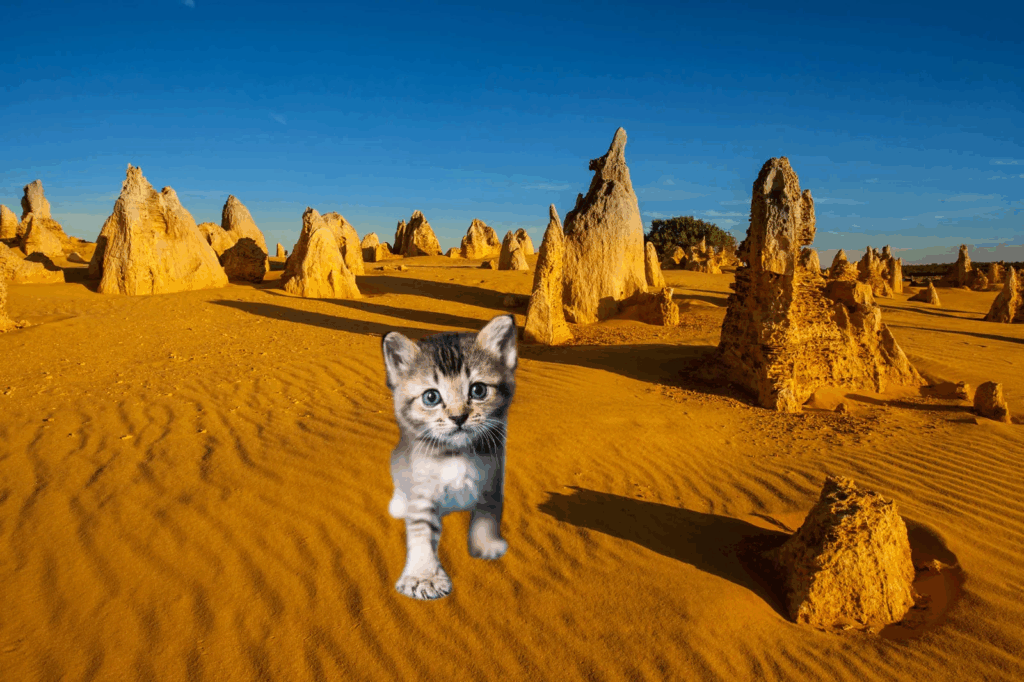
Composite the Mask
Connect the output of the Grow Mask with Blur node to the Image Composite Mask node. This allows you to replace the background while maintaining the integrity of the foreground subject.
4. Saving the Final Image
Once satisfied with the mask and background replacement:
- Add a
Save Image Extendednode to save the output to disk. - Ensure the
Queue Modeis set toQueue. - Unbypass the save node using
Ctrl + Band queue the workflow to save the image.
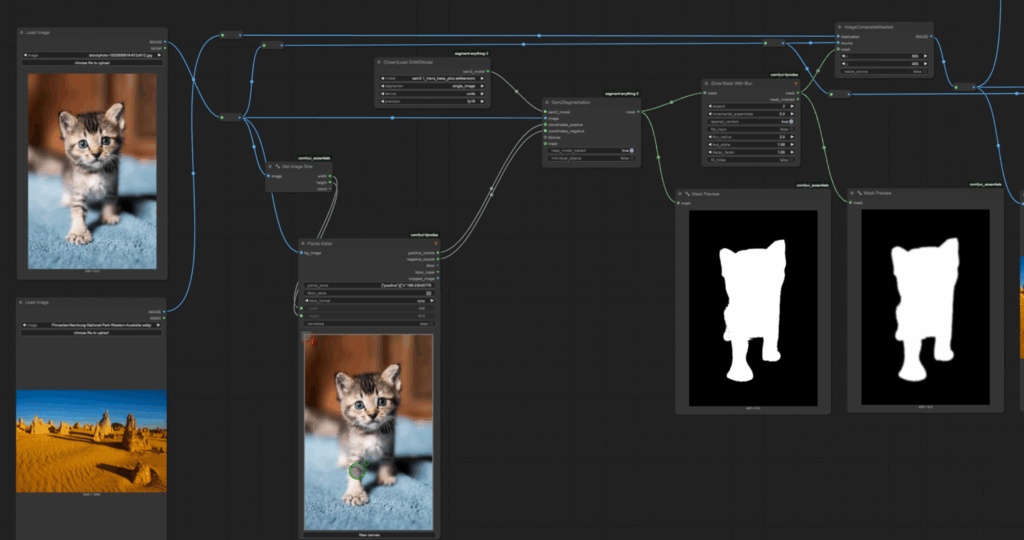
Example Workflow
Below is an example of the workflow setup:
1. Load Image Node → Get Image Size Node → Points Editor Node
2. Download SAM 2 Model Node → SAM 2 Segmentation Node → Mask Preview Node
3. Grow Mask with Blur Node → Image Composite Mask Node → Save Image Extended Node
Enhancing Mask Precision
To ensure optimal mask precision:
- Use the
Points Editornode to define the foreground and background points accurately. - Experiment with blur and expand values in the
Grow Mask with Blurnode to balance edge softness and mask coverage.