In AI image generation, resolution plays a critical role in determining the quality and composition of your output. Adjusting pixel counts and aspect ratios can significantly impact the final result, especially when working with models like Stable Diffusion. This guide explores best practices for optimizing pixel counts, understanding latent space, and using tools to simplify the process.
Table of Contents
Why Resolution Matters in AI Image Generation
The resolution of your generated image affects both the composition and quality. Here’s why:
- Impact on Composition: Changing resolution alters the pattern of random noise in the latent space, which directly influences the final image composition.
- Training Data Alignment: For optimal results, the resolution should closely match the resolution of the training data. For example, Stable Diffusion 1.5 (used in the Realistic Vision 5.1 model) was trained on 512×512 images. Deviating too far from this resolution can degrade quality.
Understanding Latent Space and Multiples of Eight
When generating images, the latent space is much smaller than the final resolution. Specifically, the latent space is 1881 of the resolution on each side, or 164641 of the total area. To ensure compatibility, resolution values must be multiples of eight. Most tools automatically adjust non-conforming resolutions to the nearest multiple of eight.
How to Optimize Pixel Count for Best Results
1. Matching Training Resolution
- Start by aligning the resolution with the training data. For Stable Diffusion 1.5, this means a base resolution of 512×512.
- Example: If you want a 2:3 aspect ratio, calculate the dimensions by setting one edge to 512 (e.g., height = 512) and adjusting the other edge proportionally (width = 512×0.666≈344512×0.666≈344).
2. Extending Beyond Training Resolution
- Use the training resolution as the shorter edge and extend the canvas proportionally.
- Example: For a 3:2 aspect ratio, set the width to 512 and the height to 512×1.5=768512×1.5=768.
3. Avoiding Extremes
- Very high resolutions (e.g., 1000×1504) or very low resolutions (e.g., 200×304) can produce distorted or unrealistic results. Stay within the model’s tolerance for best outcomes.
Automating Resolution Calculations
Manually calculating optimal resolutions can be tedious. Tools like yaResolution Selector (YARS) simplify this process:
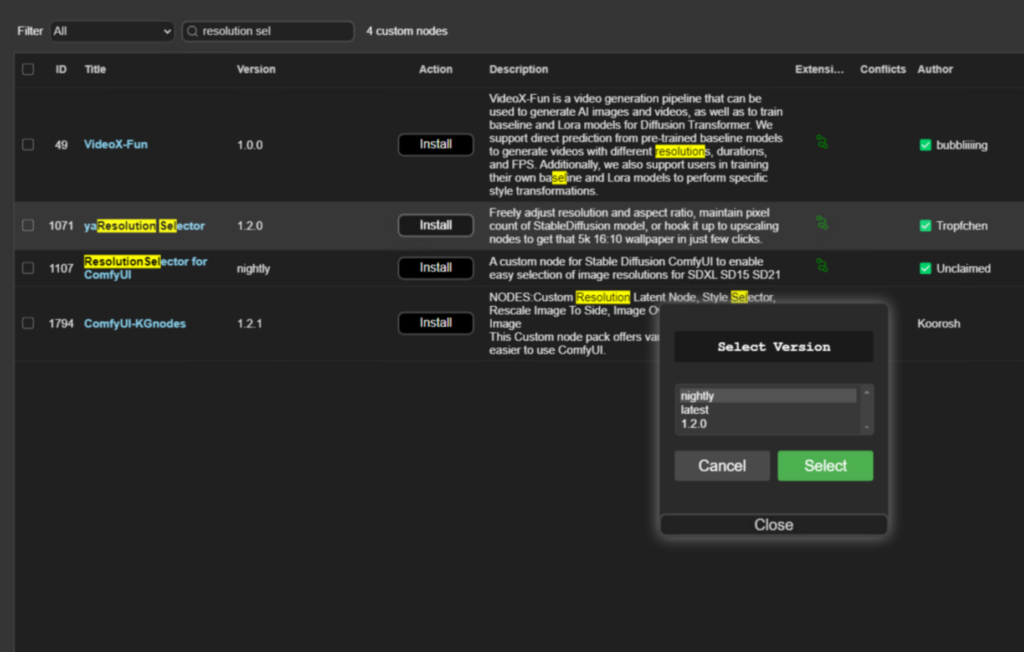
- Installing YARS in ComfyUI:
- Go to the custom nodes manager in ComfyUI.
- Search for “YaResolution Selector.”
- Install the node and restart ComfyUI.
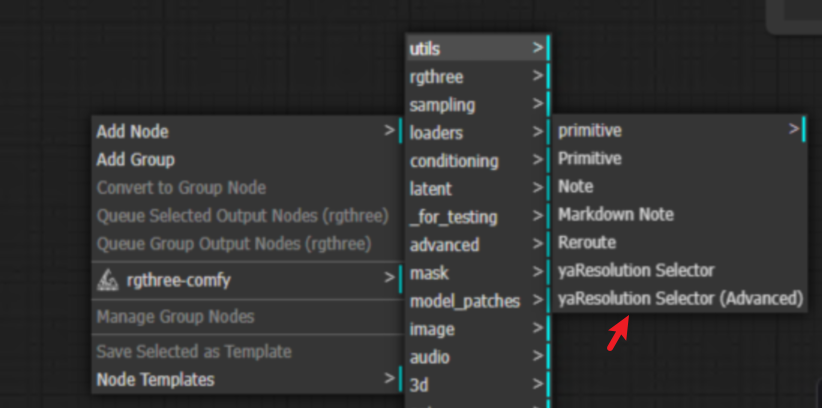
- Using YARS:
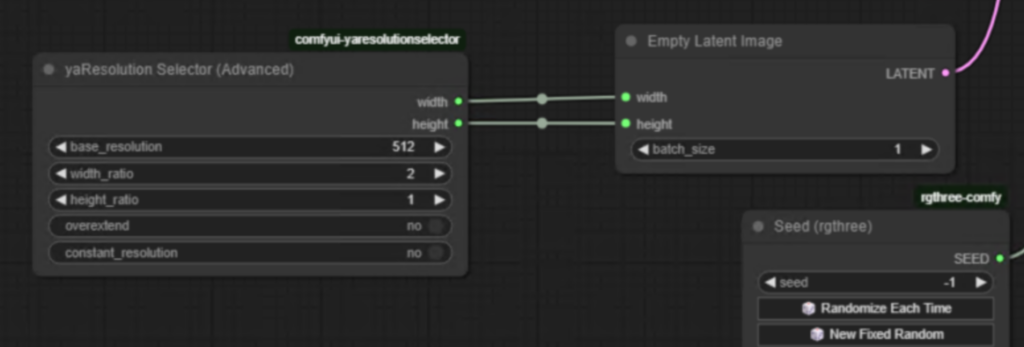
- Add the “yaResolution Selector Advanced” node.
- Input the desired aspect ratio (e.g., 10:15 for 2:3).
- Enable Constant Resolution to automatically match the training resolution.
- The tool adjusts the resolution to the nearest multiple of eight and ensures optimal results.
Practical Examples
Example 1: Matching Training Resolution
- Desired Aspect Ratio: 2:3
- Calculation: Width=512,Height=512×1.5=768Width=512,Height=512×1.5=768
- Result: A high-quality image closely aligned with the training data.
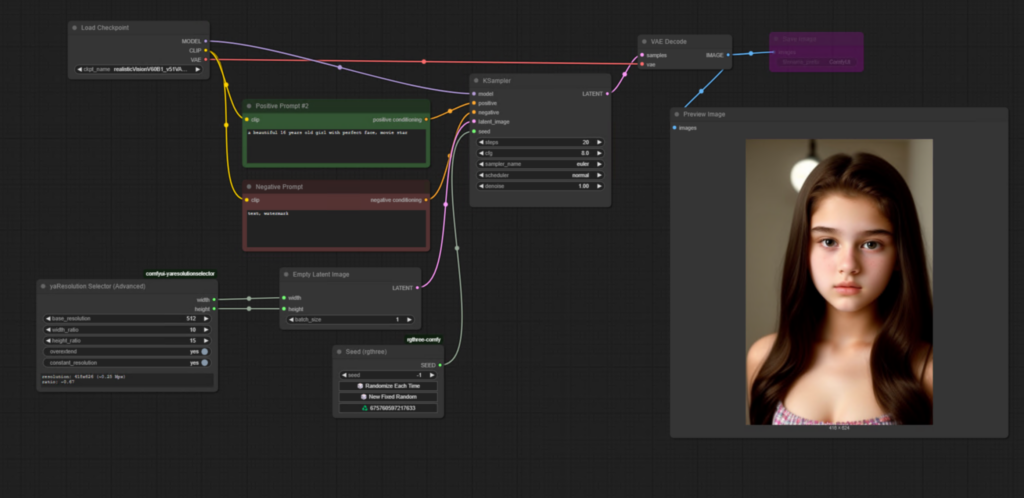
Example 2: Using YARS for Automation
- Aspect Ratio: 2:3 (input as 10:15)
- Base Resolution: 512
- Output: Automatically calculates and adjusts to 416×624 (rounded to multiples of eight).
Tips for Best Practices
- Stay Close to Training Data: Always aim to match the resolution of the training dataset for the best results.
- Use Tools for Efficiency: Automate repetitive calculations with tools like YAR to save time and reduce errors.
- Experiment Within Limits: Test different resolutions within the model’s tolerance to find the sweet spot for your specific use case.